Show me your map and I'll tell you where you are - Mapping at Elements Destiny
Territories, cities, dungeons - they are literally the ground on which the story of a game can take place. The player traverses numerous maps, discovers new things in them and is surrounded by them when the story gets down to business. They take up a large part of the picture, the visuals and, accordingly, the game experience. But how is a map created? What thoughts go into the design of an area, from the idea to its implementation in the engine?
For this purpose, we have asked our mapper Wieland "Schilderich" Möbus to explain his approach for you. In the following, he will show you which 5 steps are elementary for him in his mapping process for Elements Destiny.
Note: Since the engine change to Unity is taking place gradually, some of the maps shown are still in the state of the old engine.
My process for creating maps for Elements Destiny
by Wieland "Schilderich" Möbus
1) Planning and concept
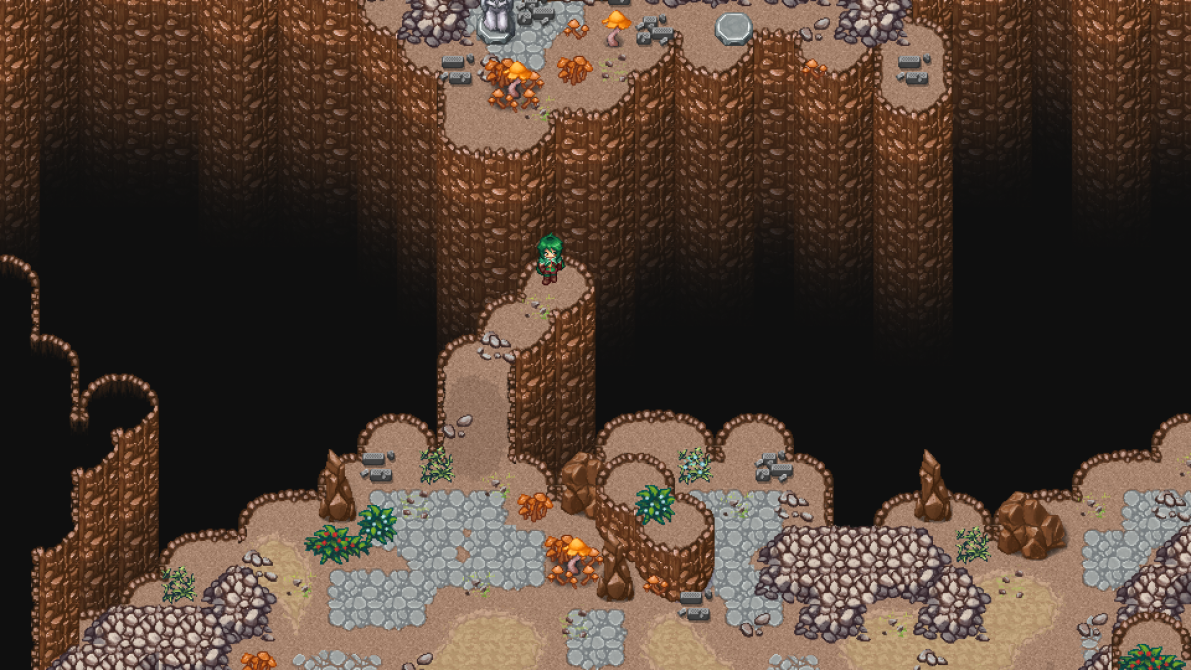
First of all, it is important to think about the basic structure and content of the map. Since most of our maps are reworkings of existing variants from the RPG Maker version of Elements Destiny, we use this template as a guide. Before the new engine is implemented, we will decide which elements (e.g. design, story significance or puzzles) should be retained and in what form, and which new elements should be added.
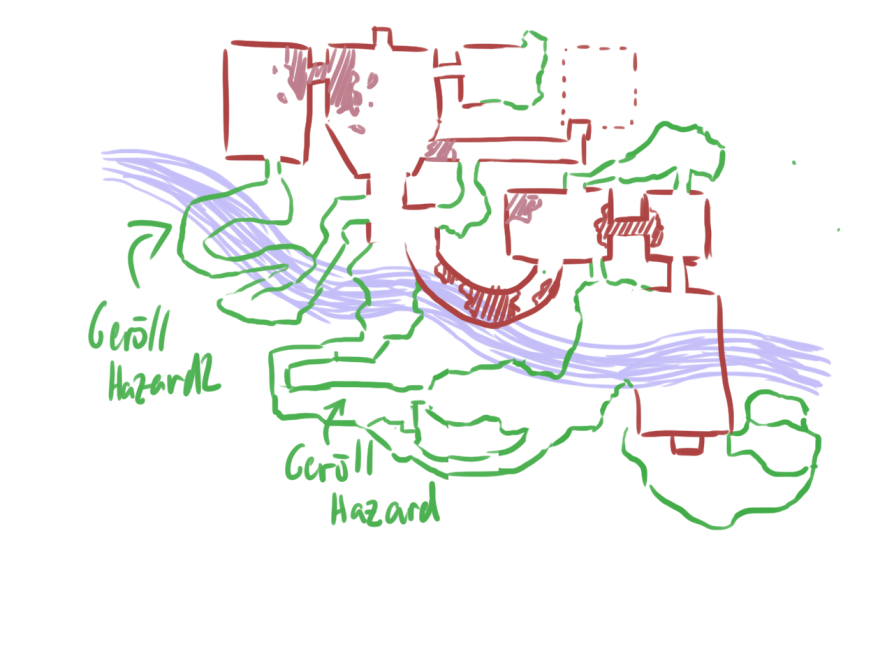
Then a rough draft of the maps is first sketched and drawn by hand. This is particularly important for the overview if it is a complex, coherent construct such as a dungeon. On this sketch, some of the game content is marked and entered in advance as an aid to thinking.
In this step, I already think about what I want to include in the revision based on the specifications: be it new details for the design, the structure of puzzles, etc. I also think about what I want to include in the revision.
2) Collection of materials
Based on the planning and the concept, I now have a pretty good idea of all the assets I need for the map. From our pool of tiles (the building blocks, so to speak, from which a map is puzzled together) and sprites, I then pick out everything I might need for this map. This is then used to create my tile set for this map (e.g. as shown in the picture below). If there is no suitable graphic for something at the moment, I also work with placeholders for the time being. These can be easily replaced later in the development process.
Speaking of the development process, it can of course happen that further assets have to be added or existing assets have to be edited. This happens especially when I or someone from the writing or game design team comes up with a new idea in the meantime that we want to integrate later. Since a tile set is modular, individual components can be adapted or added relatively flexibly, which makes this process easier.

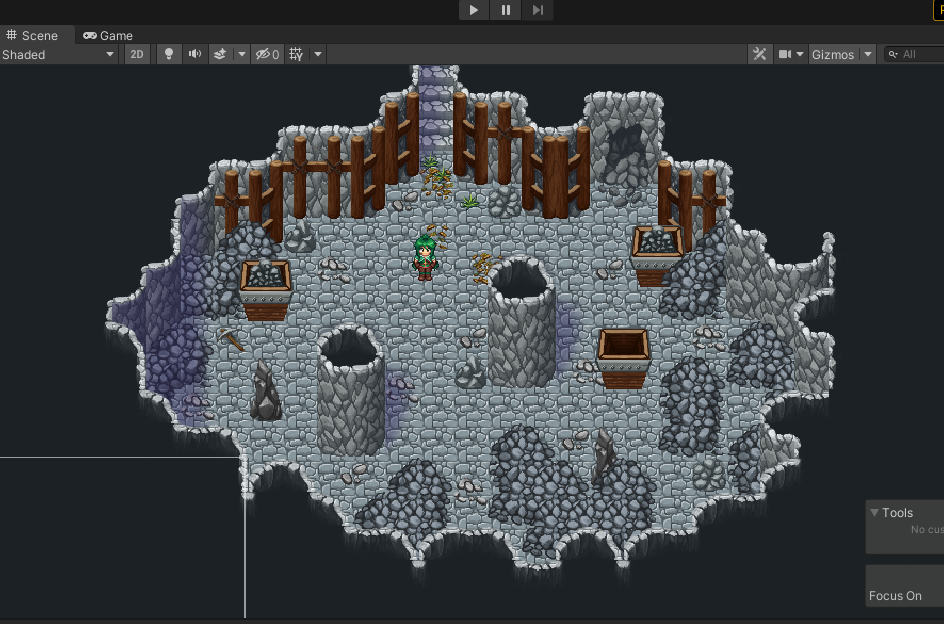
3) Create the map
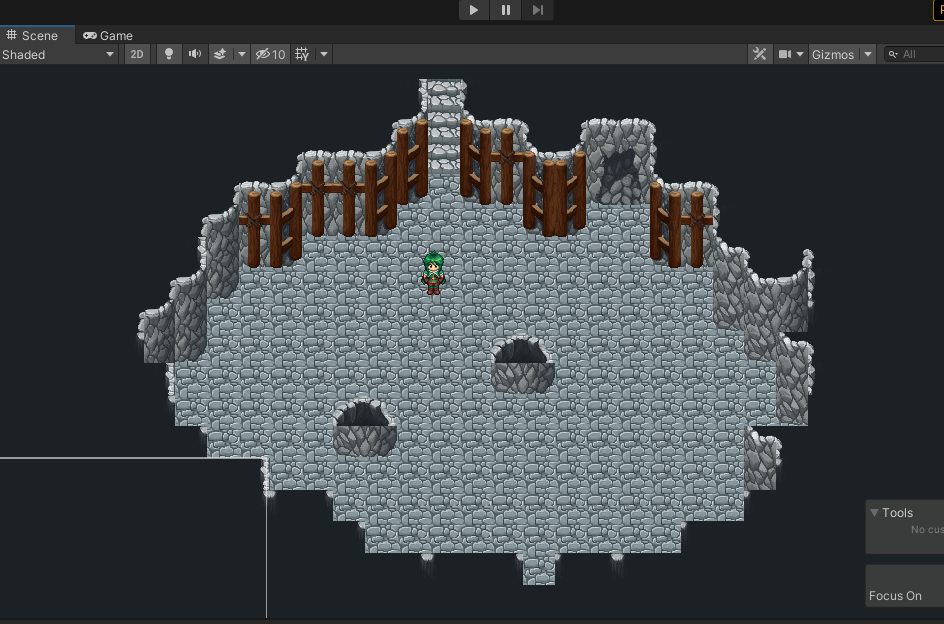
Now for the technical part. I create a new map according to the basic dimensions and planning in Unity and set up different "layers" for myself. These layers serve to divide up a game area in a technically and playfully correct way, as you can roughly group the sprites into "below the player", "not passable by the player" and "above the player". They make it possible, so to speak, to technically incorporate the desired gameplay into the map. I then organise the tiles and sprites according to these categories.
From the previously collected assets, I now place all those I want to work with in this design step in the corresponding layer. I don't have to fill each field individually or place each part separately, but can also work with tweezers and the fill tool.
In this step, only a rough structure is important at first: floor, walls, columns, ceilings and chasms. The basic design should make it clear where the player can walk, which paths are blocked, where the character is concealed, etc. So for the time being, I am only building the "room".
4) Refining the map
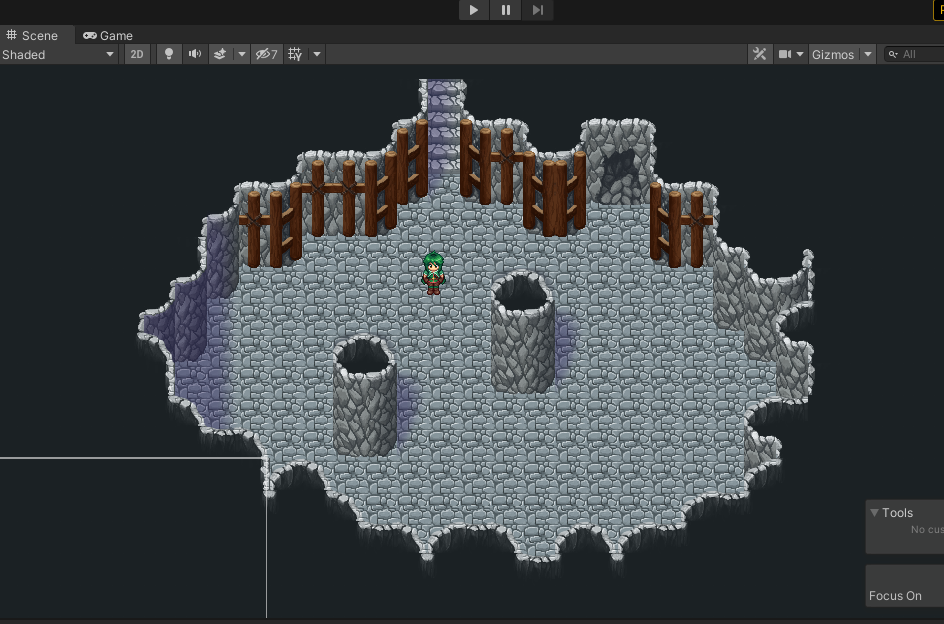
In this step, I basically put all the details, decorations and objects that are necessary for the map onto my base map. Occasionally, I make adjustments to the assets or gather more - depending on what I need at the moment and what arises in the course of the design process.
I also put puzzles and chests on the map in this step, based on the initial planning for the area. In the early design phases of a map, we also work with prototypes and placeholders so that the gameplay and writing teams can make changes more easily if necessary. However, thanks to the existing RPG Maker template, all maps and puzzles are already available as a basis and can therefore also be mapped.
In this step, I place special emphasis on "environmental storytelling", i.e. I make sure that these maps not only work from a playful point of view, but are designed in an appealing way in terms of worldbuilding and story. Details should arouse interest or give a larger context, people within the game world should be able to interact with parts of the map, etc. The latter is especially true for dungeons. The latter is especially important in dungeons, so that the player can solve puzzles and learn a bit of the backstory of the world.
Keyword interaction - so that the player can interact with parts of the map at all, so-called "events" must be created on a map. These are, so to speak, small code markers or building blocks that ensure that, for example, the player can address a bookshelf and read a text stored there as a book. Without this "event", nothing would happen in front of the shelf when the interaction button is pressed. Events help to integrate the game elements for e.g. puzzles but also enemies and story into a map and breathe life into it, so to speak. But this step is mainly done by other team members. Perhaps they will tell you more about this process in an upcoming blog entry? In this way, a complete, playable area is created from the basic framework, details and events, which is ready for use.

5) Testing
Or let's say almost ready. Before a map can be approved and built into the game, it must be tested. This includes, for one thing, testing the walkways and levels - can the player enter everything that is intended or looks appropriate? Is the player only covered where he or she is supposed to be? Do all the chasms, rocks, fences etc. stop the player as planned? The coding/scripting for the puzzles, enemies and the story must also be checked at this point. For example, opponents must not walk over walls or attack the player in conversation. Or it must be checked how overlapping events behave and whether conflicts arise during their execution. Our testing team therefore puts every map through its paces to ensure that no unwanted surprises await the player. Only after their "go" is the design of a map considered complete and the map is included in the game.
Many thanks to Schilderich for his explanations!